
Laser Grading Tees
Making that which should be level, level...

A couple of seasons ago, in the never-ending search for ways to improve the golf course, we purchased a laser guided box blade. The unit has dual laser receivers and connects to the remote hydraulics of a Toro Sand-pro. As our team has gained experience with the unit, we have found it to be a quick, easy and cost-effective way to level teeing grounds on the golf course. As time has gone by, I’ve found it fun and interesting to take on course improvements of this nature. It has been fun to learn and to pass along to other team members.
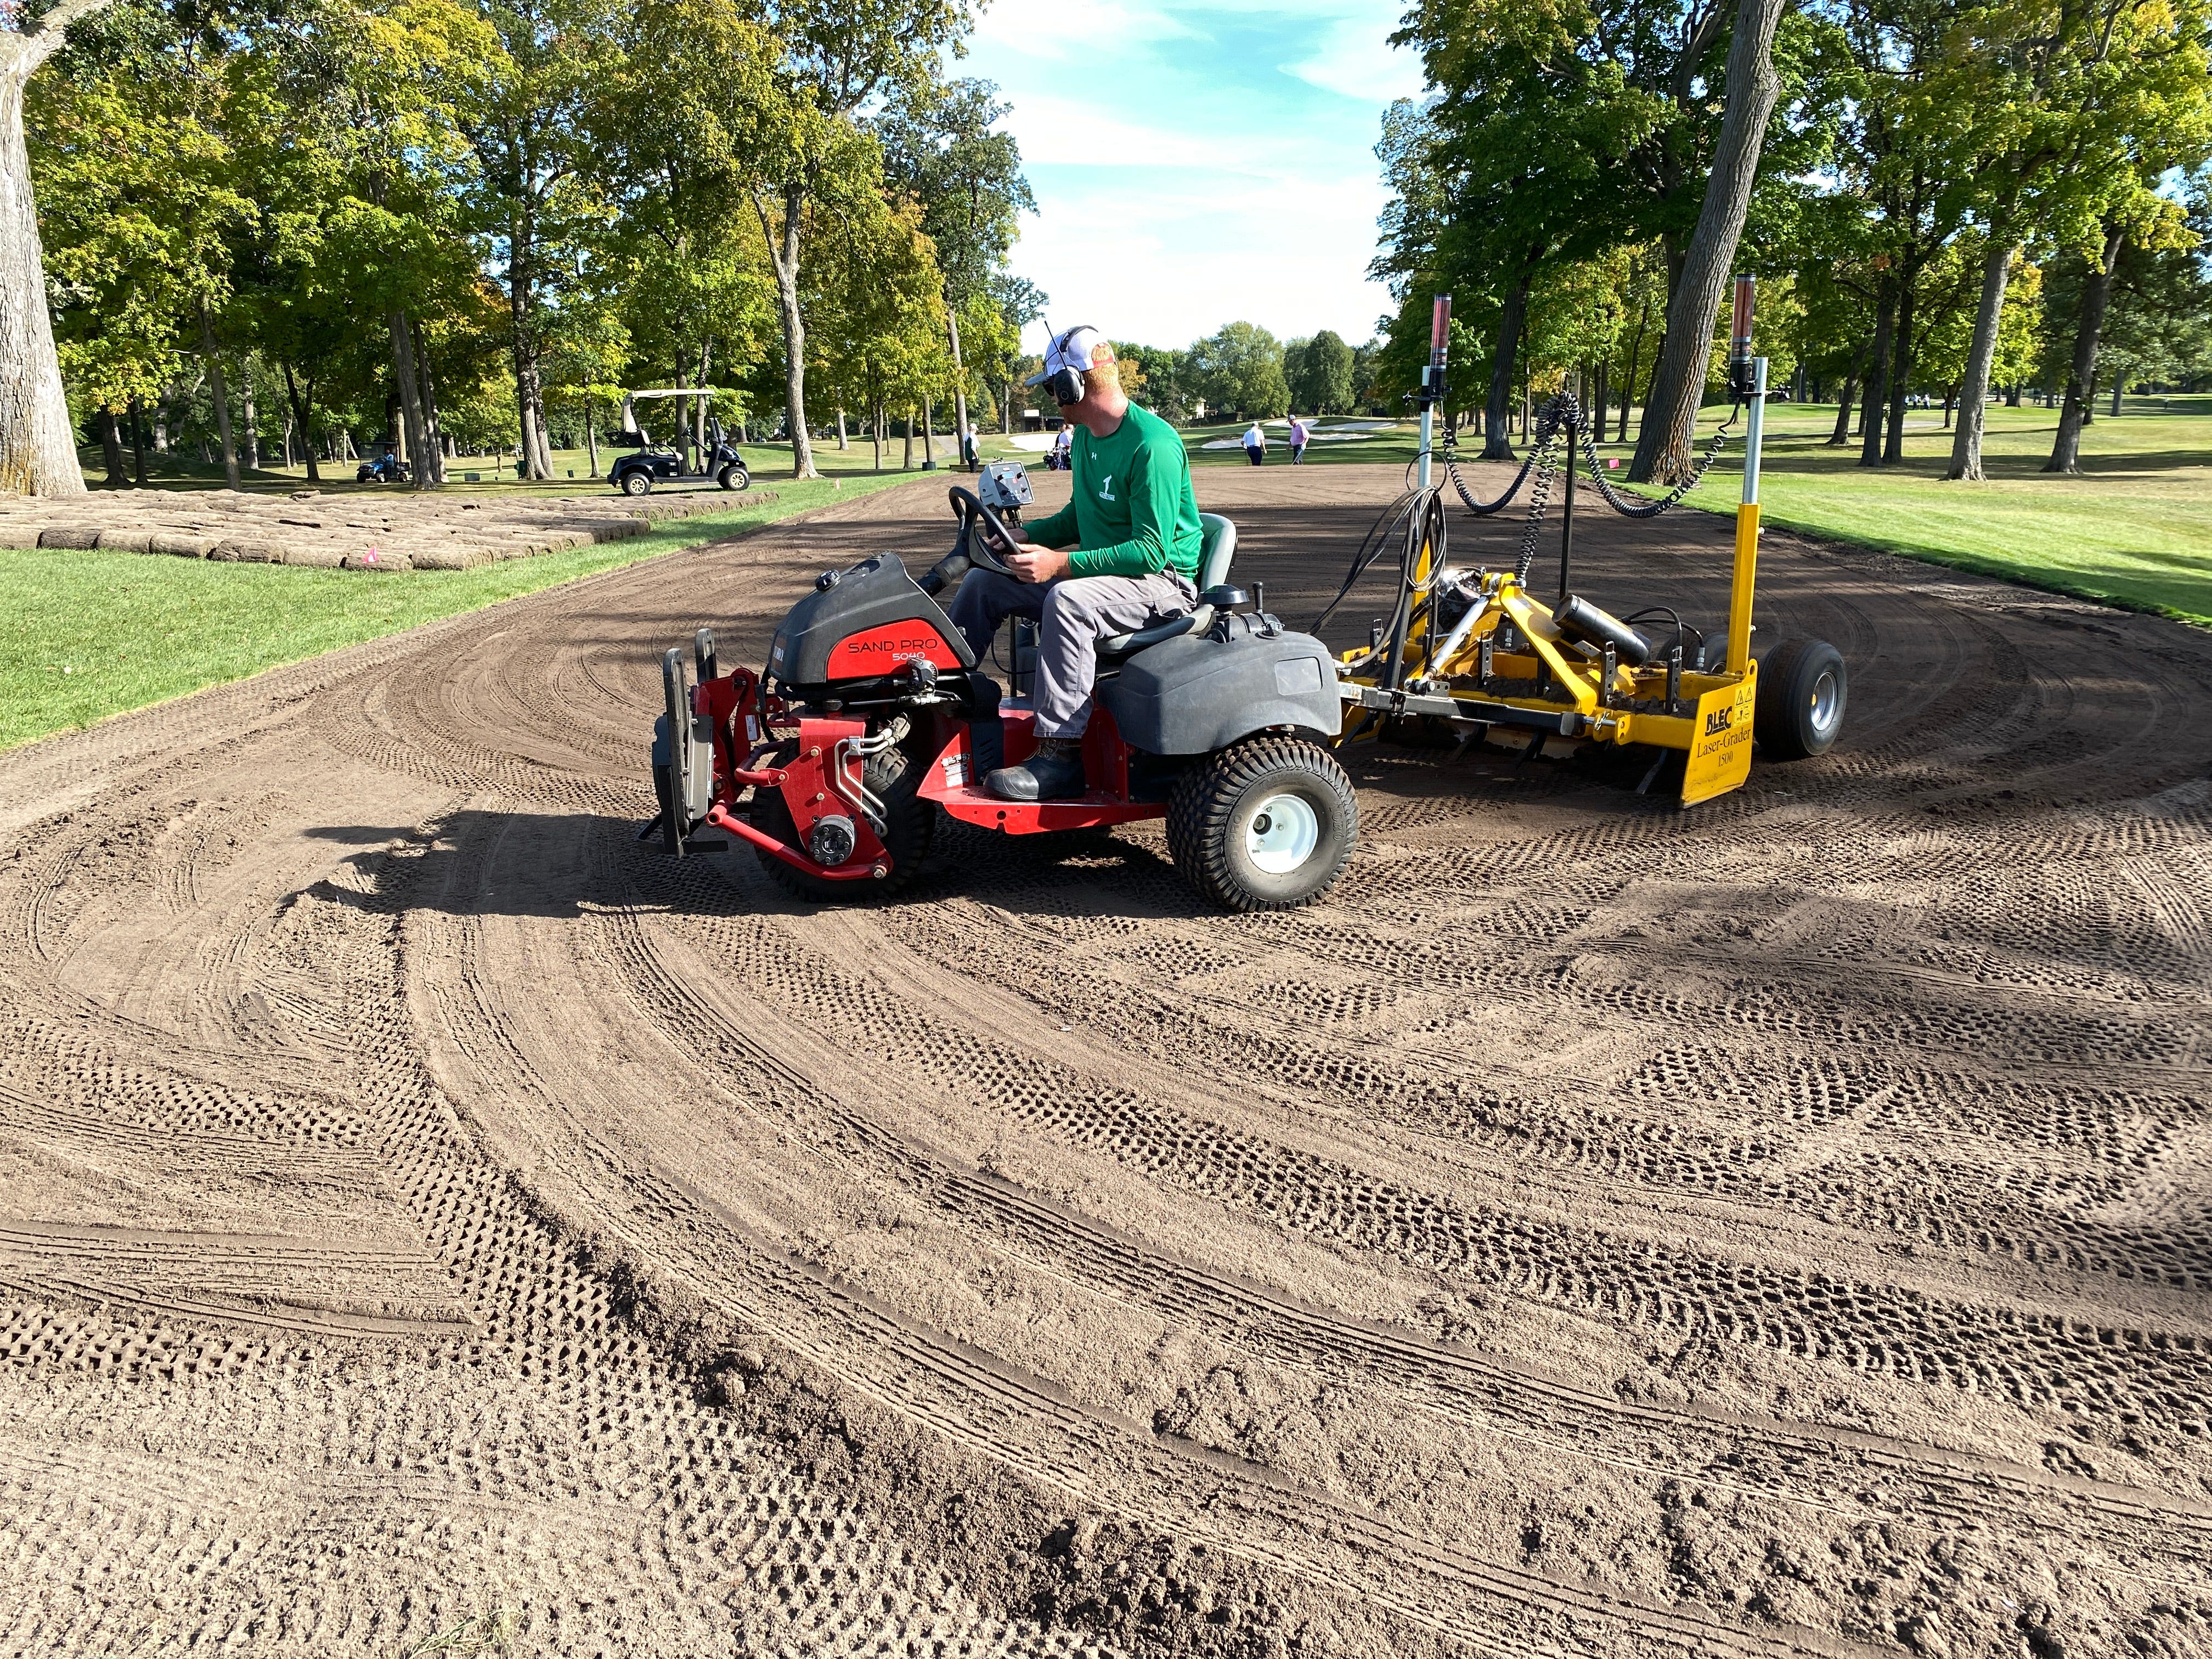
We have all been on golf courses with teeing grounds that are not level. In most cases, year’s of divot filling have created a crown down the center of the tee box.1 Most golfers tee it up with little thought of the crown. A savvy player may even use the crown to aid in shaping their shot. A crowned teeing ground is not going to factor in most golfers mind, until they play from level teeing grounds. This was certain my experience with par 3 tees. I knew ours were crowned, but felt the ability to renovate in-house was maybe a little too much hassle. Then I played a course across town, where all the tees had recently been newly constructed, or laser-leveled. It was a wonderful experience. It made me realize it was something we needed to be pursue.
During our time with our laser-grader, we have completed two half-acre practice tees and five par 3 tees sized between two and four thousand square feet.2 Our team has gotten to be quite good at the process, going from sod-off, to sod-on in about two working days.
Here’s the process our team has come up with for leveling an existing teeing ground:
We shoot the existing grade of the surface to be leveled. Almost certainly, the original surface will have been built with a water-shedding slope of 1% or so, in some direction. Hopefully the builder will have thought about the direction they sloped the tee, because if it can be avoided, you will want to shed the water away from the golfer’s approach, as well as any nearby playing surfaces.
I say hopefully the builder will have sloped the surface properly, because on an existing surface, to reduce material movement, you will want to work with the original slope, as much as possible. Once the existing grades are recorded, you will know the original slope of the tee.
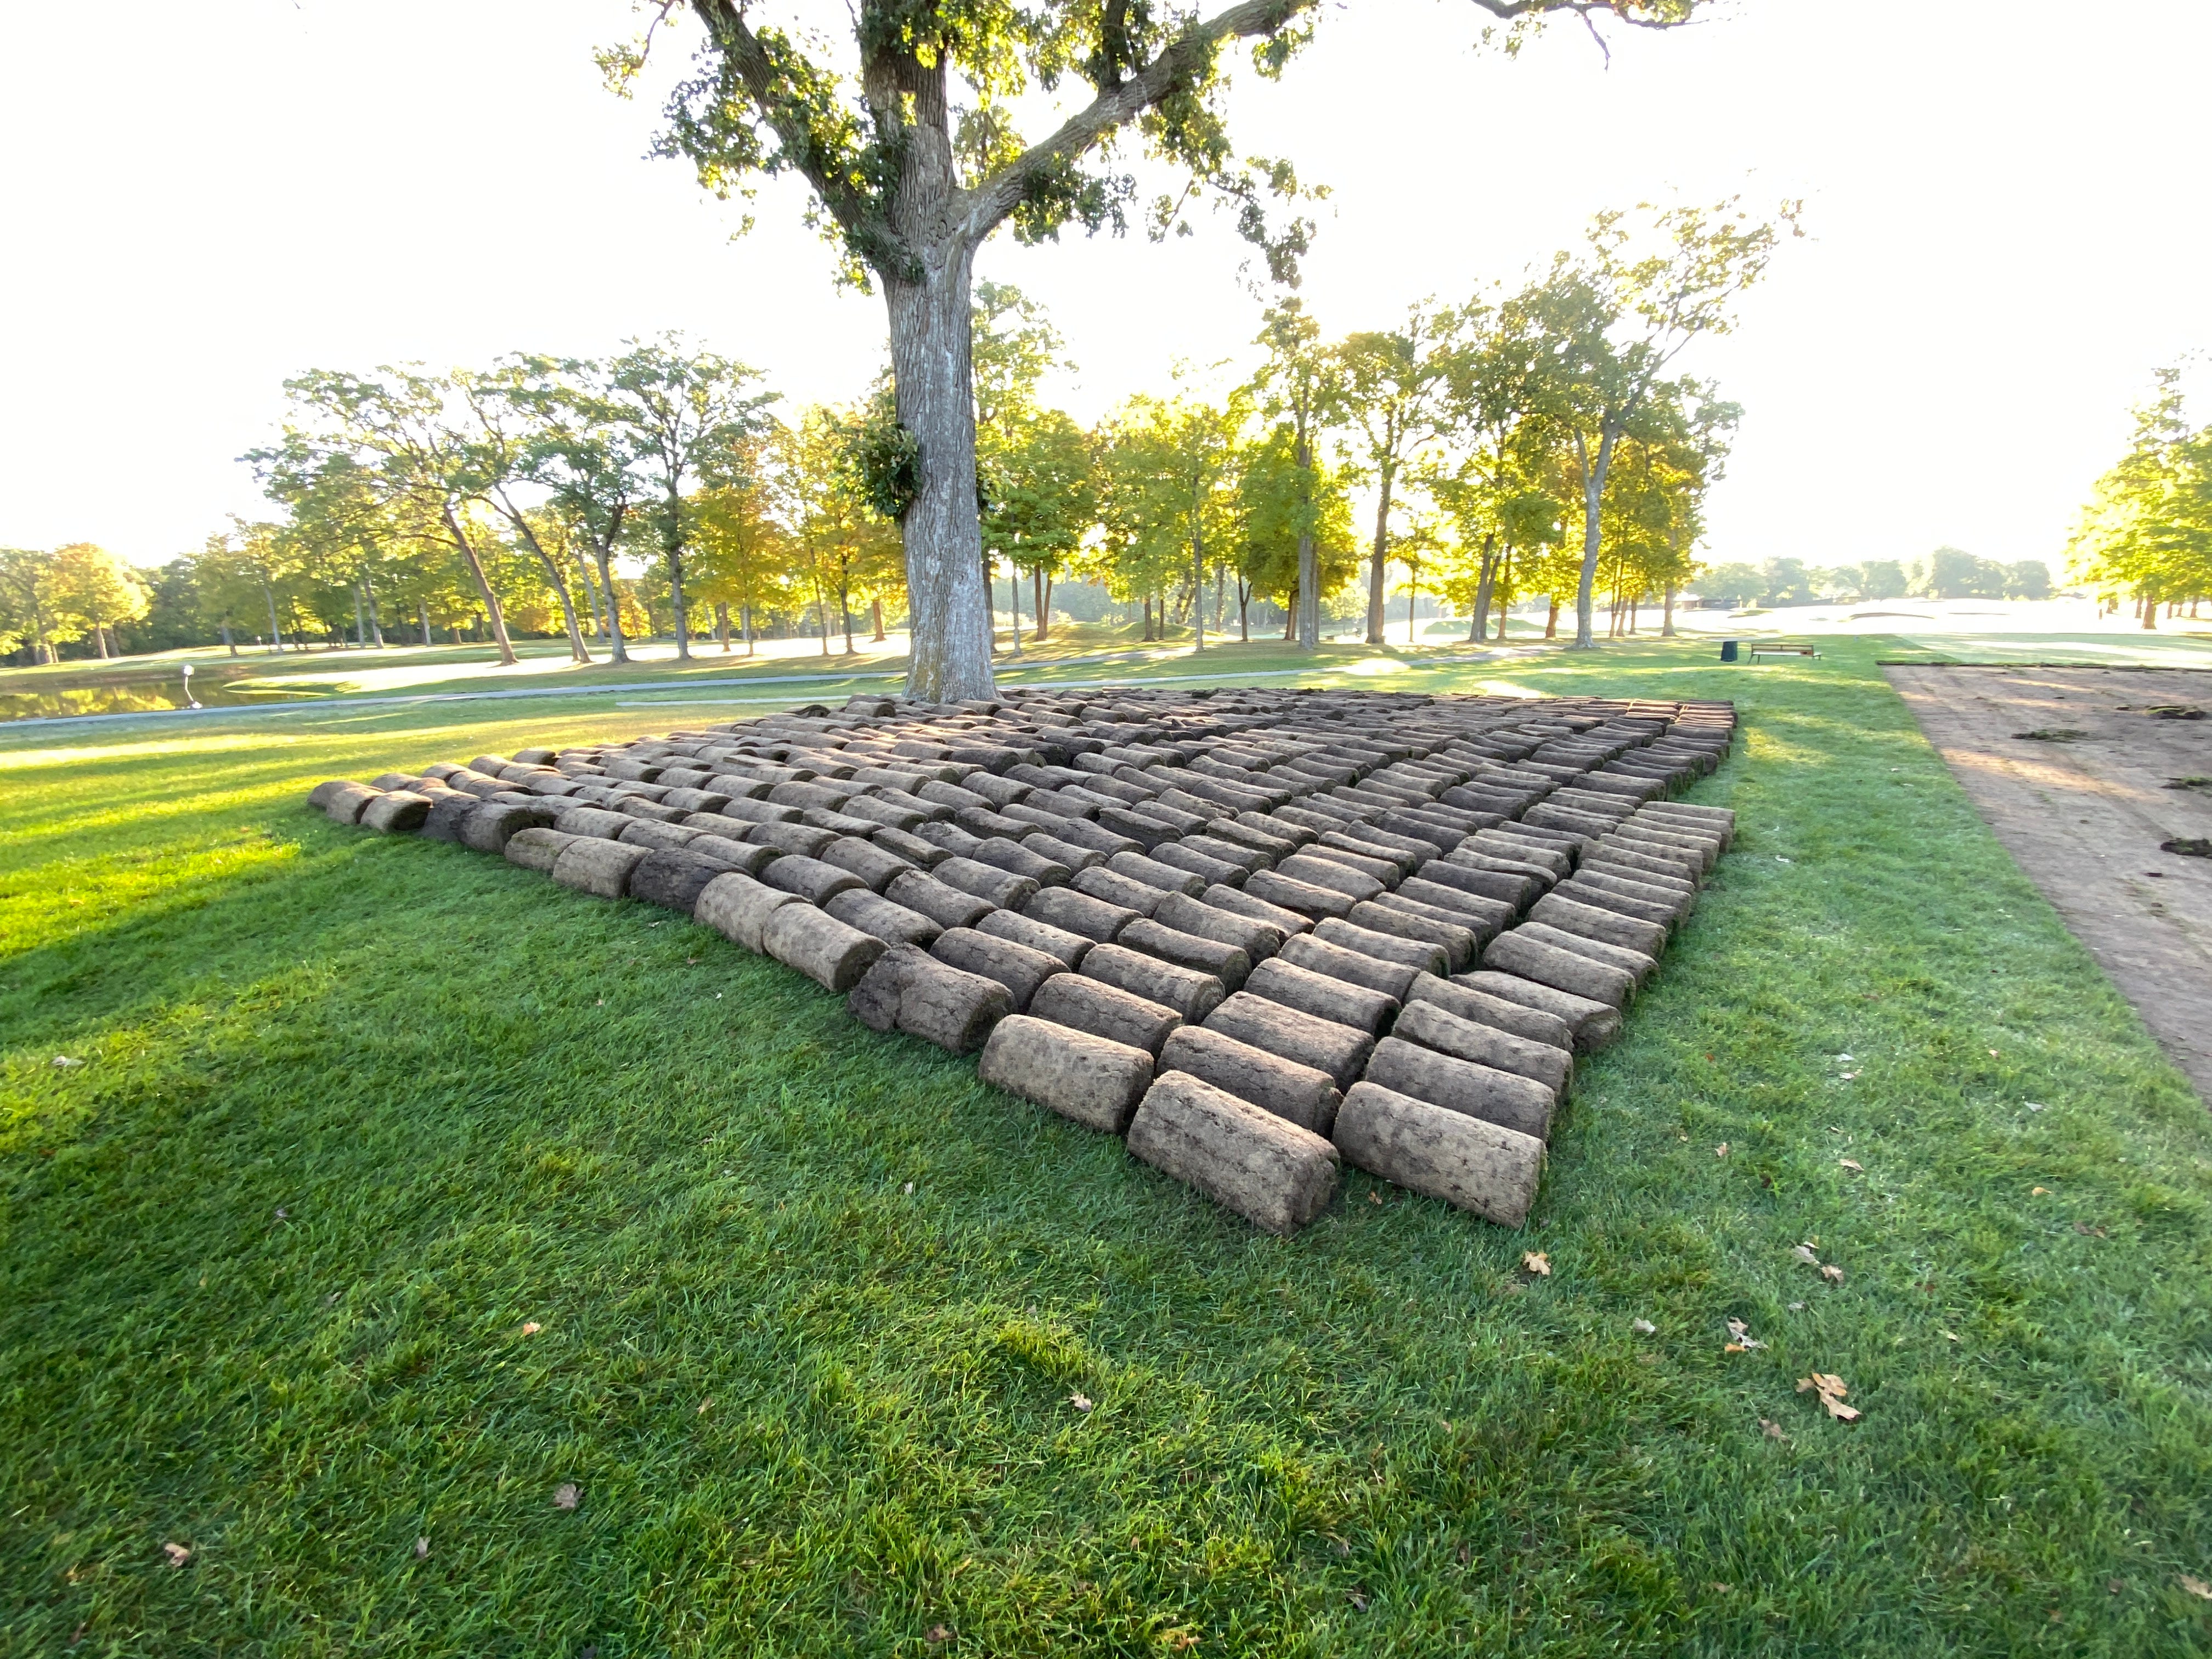
We then strip the existing sod. If the turf is of good quality, we will reuse, but discard any heavily divoted sections.3 The existing sod is rolled up and set off to the side of the tee. We do this work in the spring or the fall, when the sod can remained rolled up for 24 hours or so without heating up.

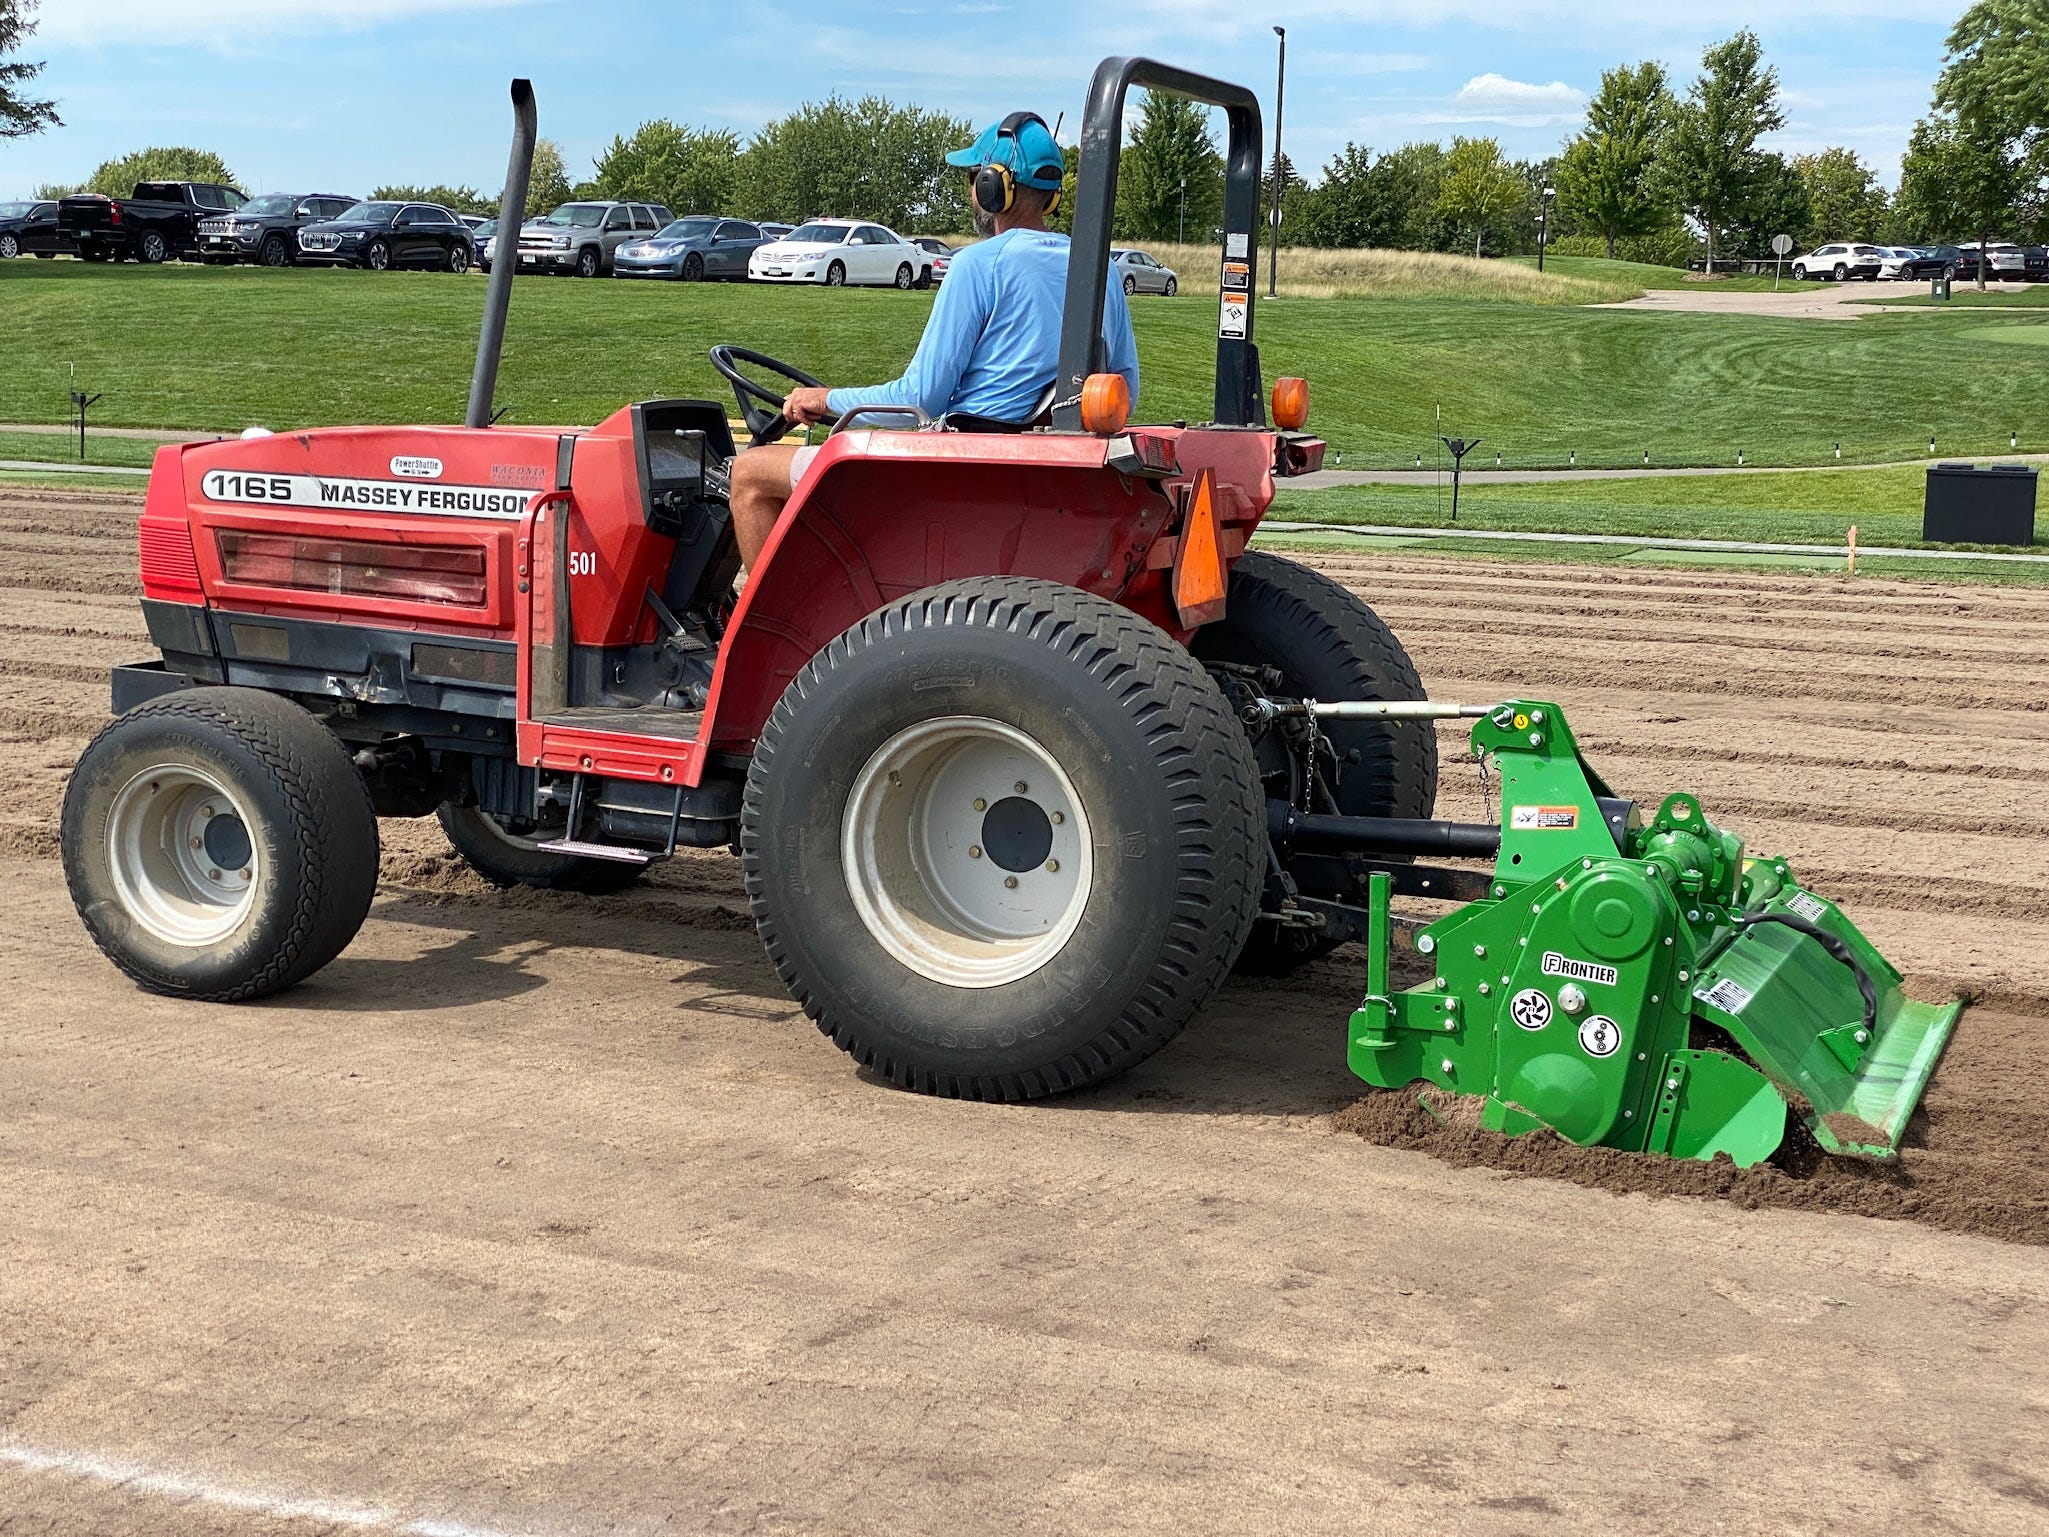
Next we roto-till, using a reverse-tine tiller4, the entire surface to a two inch depth. Without tilling, the rootmass will make it impossible for the blade to cut and fill properly.

Now it is time to set up the laser. Having shot the existing grade of the tee, you will know the slope and direction desired for the renovated surface. As much as possible, you will want to work with the existing grade. Choosing to change an existing 1% front to back slope, to a 1% back to front slope, can result in having to move a lot of material. I can be done, but when you do the math, the required material movement can surprise.
Next we set the receivers on the box blade. How you set the receivers to start will be based on your desire or need to remove the material in the crown, or reincorporate into the new surface. In the diagram below, I’ve attempted to explain how one must think about this step.
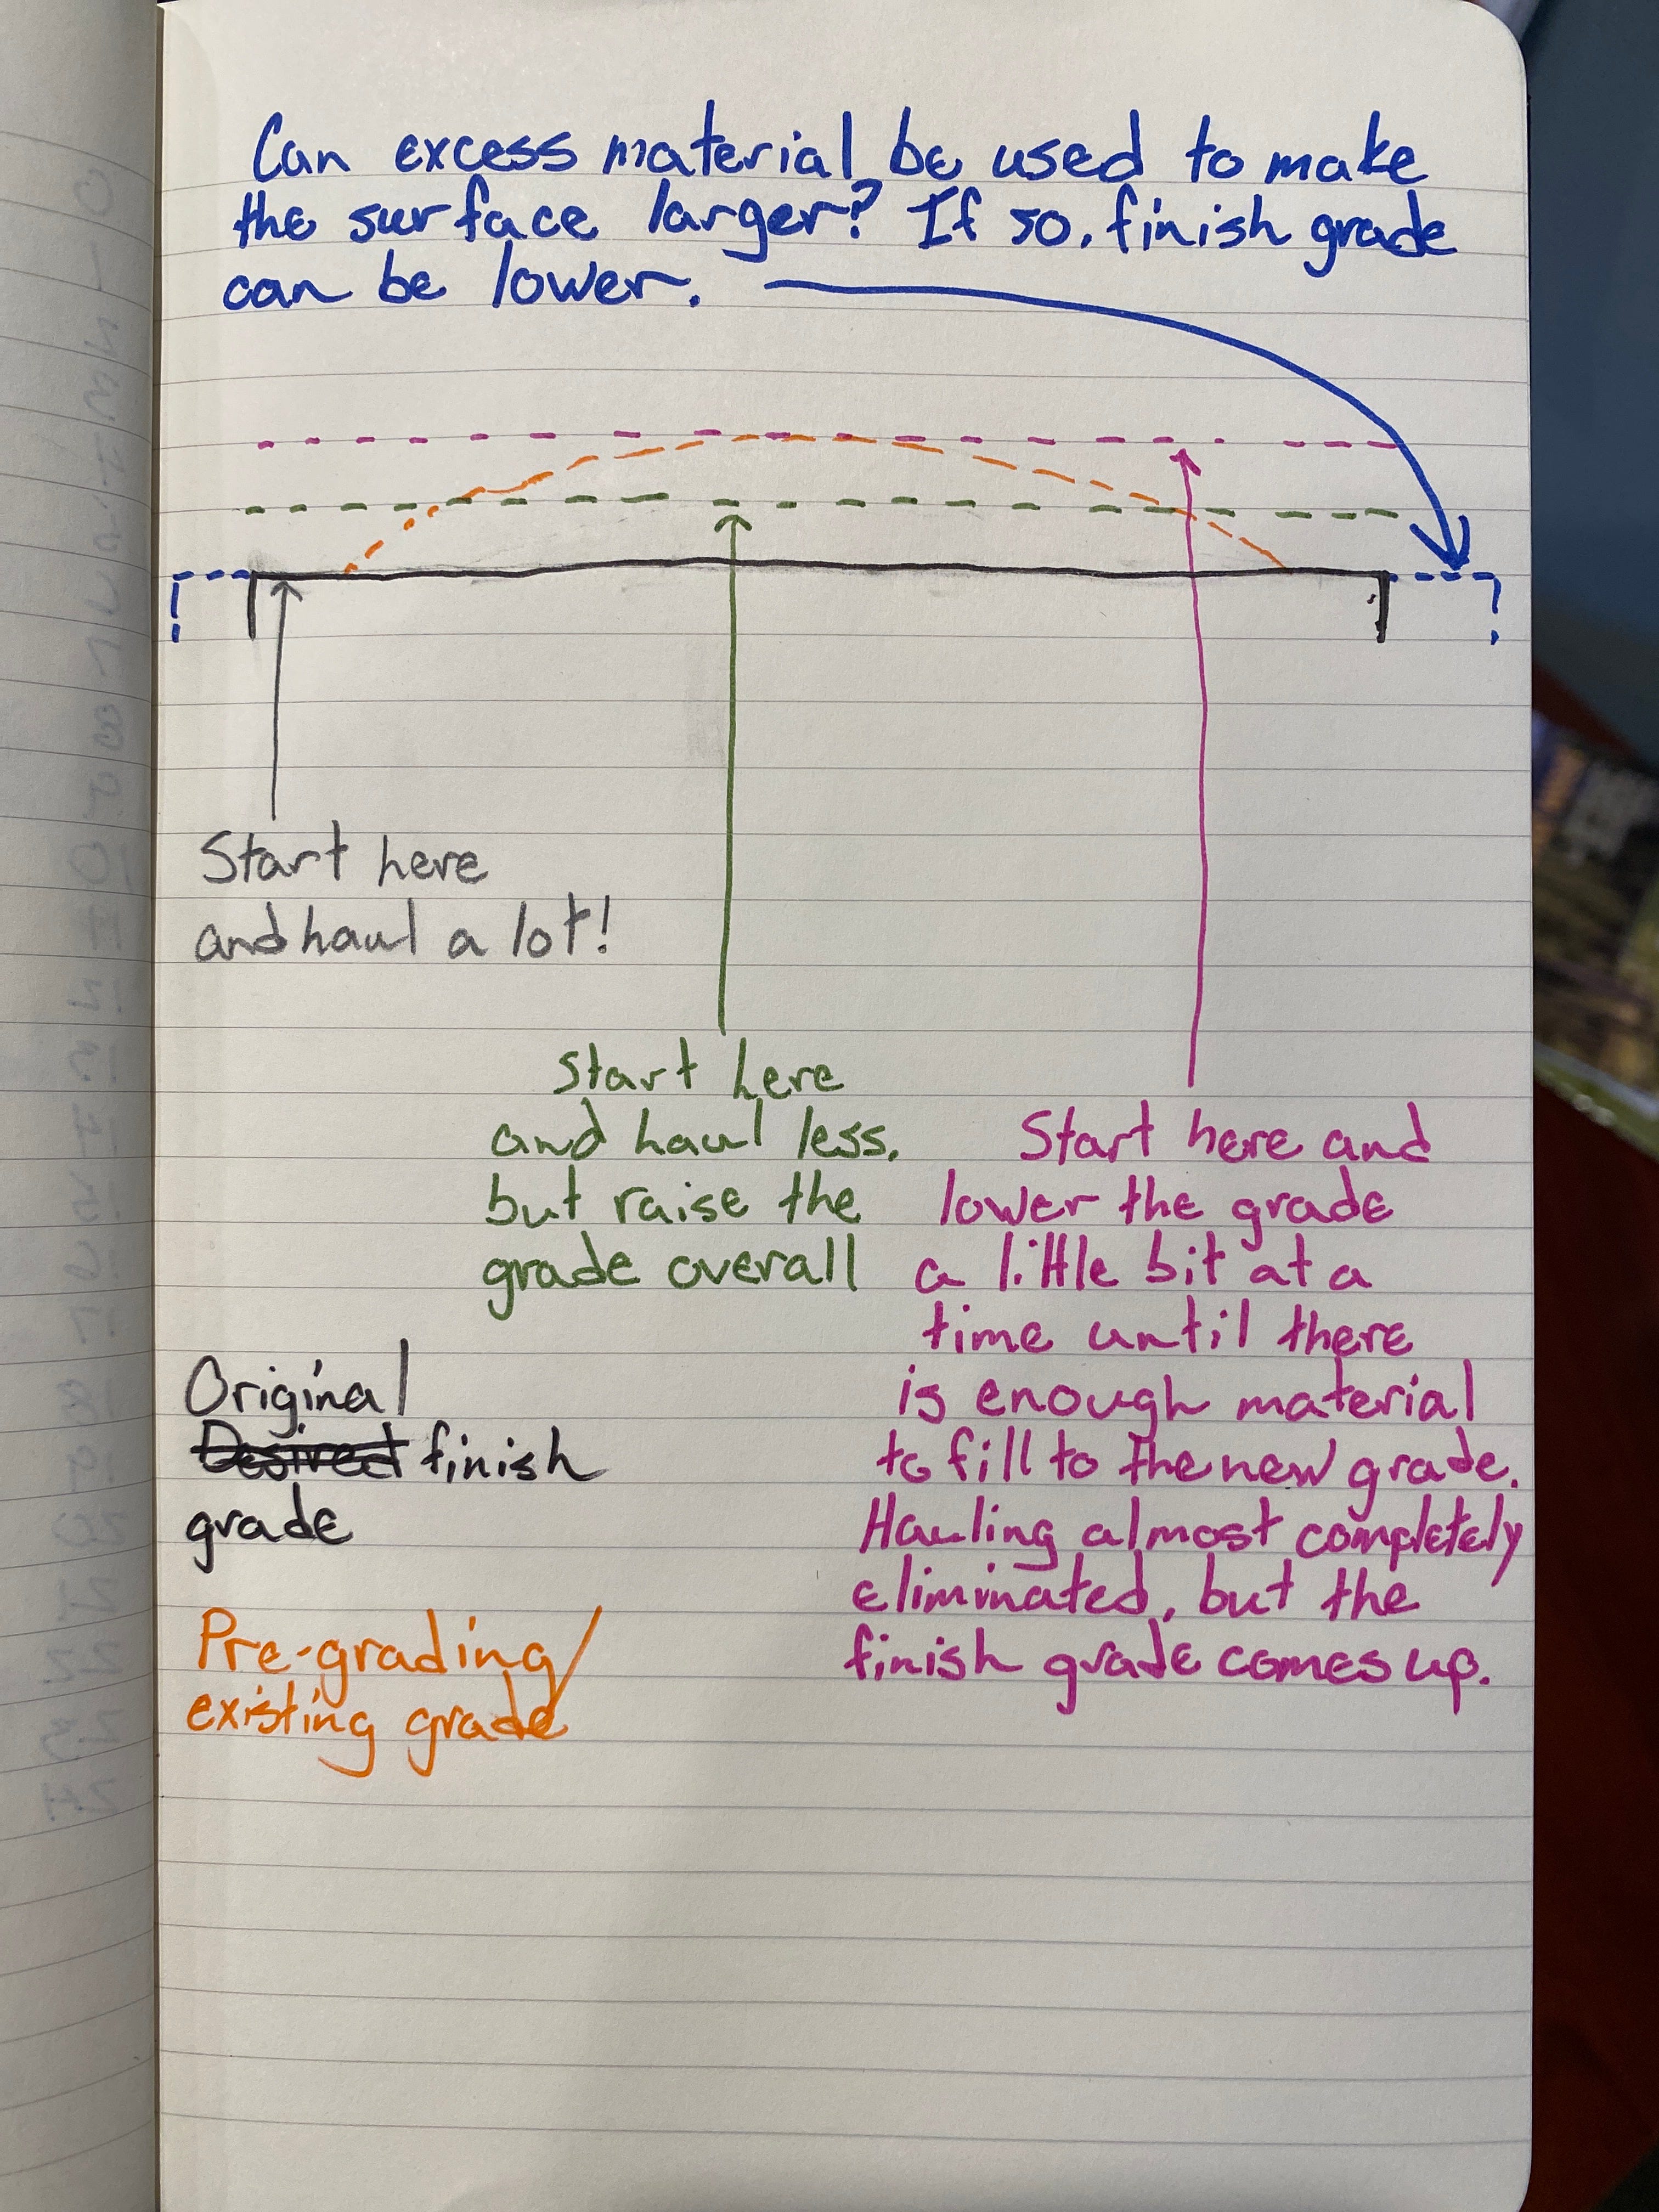
Hopefully you have looked at and somewhat understand the diagram. When leveling tees on the golf course, where a quick turnaround is desired, our team has found it best to try and keep all of the crowned material in place, thus limiting the need to haul. In this case, we measure the highest point on tee using a survey stick and laser receiver. We then set the receivers on the blade to a height one half inch or so below this point. This is done, knowing with some certainty that the receivers will need to be adjusted.
Once the receivers on the posts are set, the operator begins pulling the laser-guided blade around the tee. As they explore, cutting a small amount of material off the top of the crown, they decide how much to adjust the receivers.
The receivers are adjusted up on the posts about 1 inch at a time, meaning the blade will cut deeper into the surface. With each adjustment the operator cuts more and more off the top of the crown, filling in on the sides.
Eventually, the operator will have removed the crown and filled the low portions. At this point, the operator slowly spins around the teeing surface to fine tune the entire surface.
When done in this fashion, the need to remove any material is almost nullified, but either the finished grade of the tee will be higher than before, or you will have used the excess mix to have made the tee larger.

If your tees are squared, as ours are, getting all the way into the corners is impossible. We finish off the corners using the survey stick with a receiver and a level-lawn.
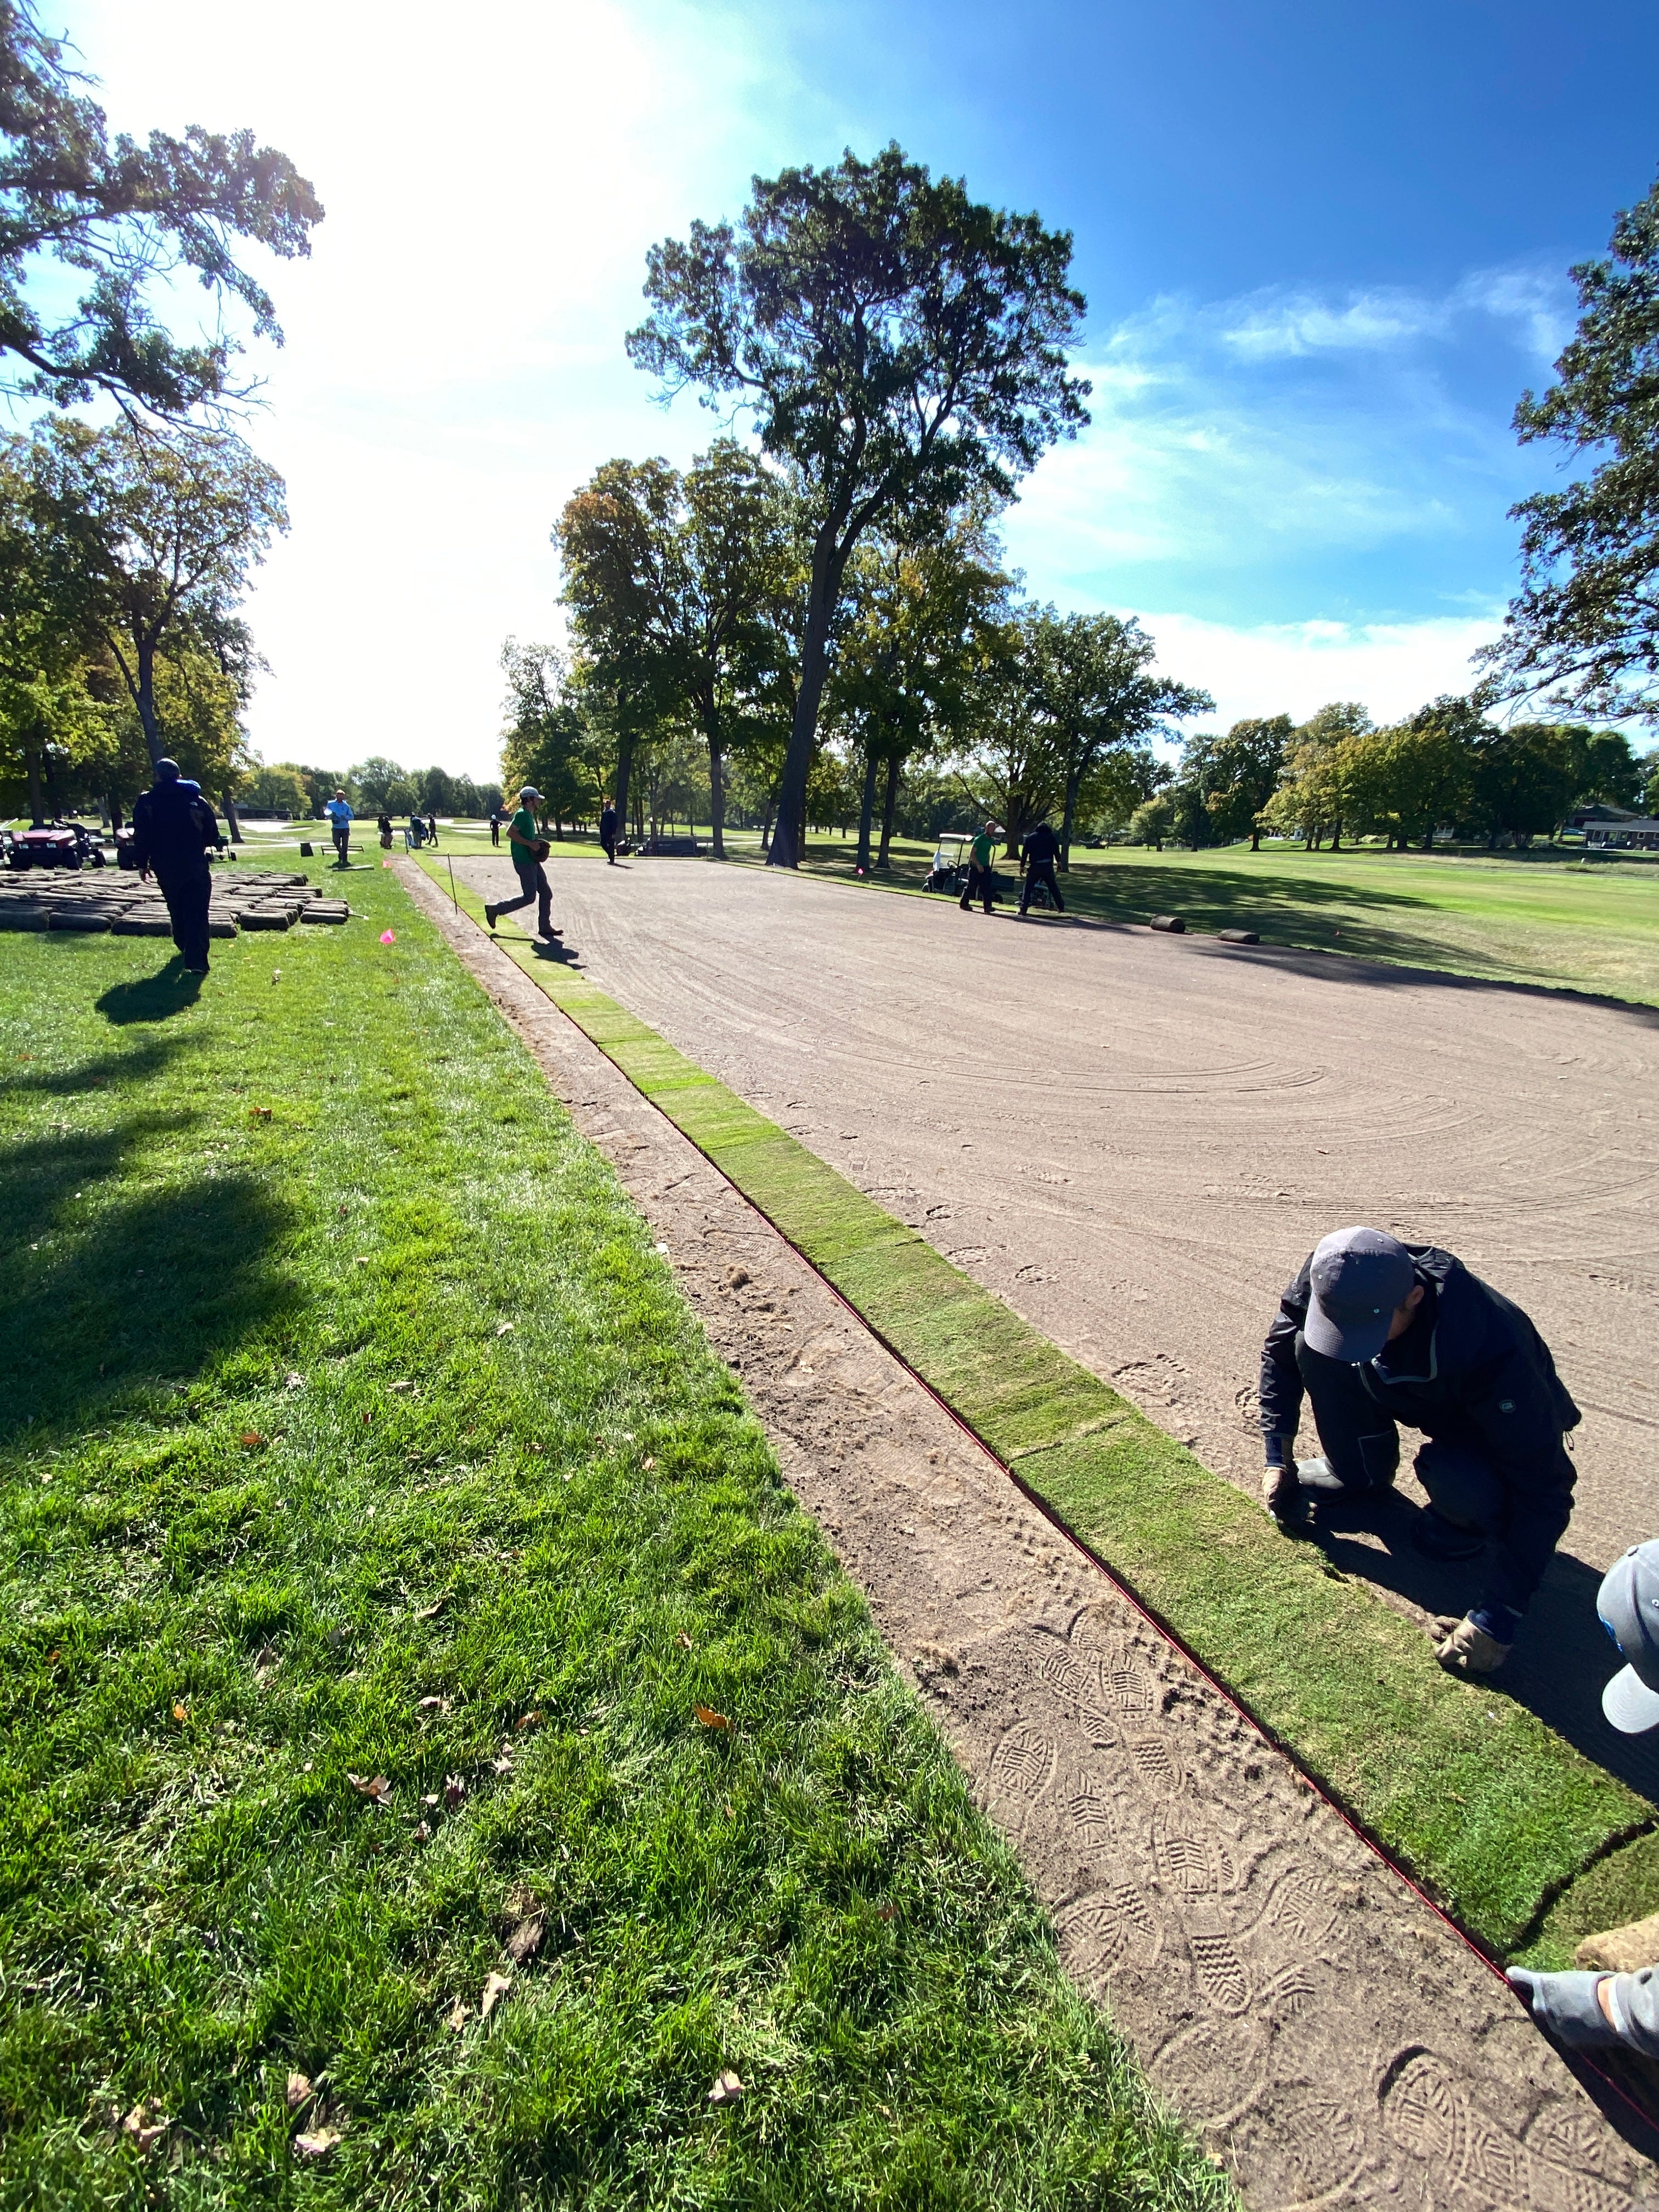
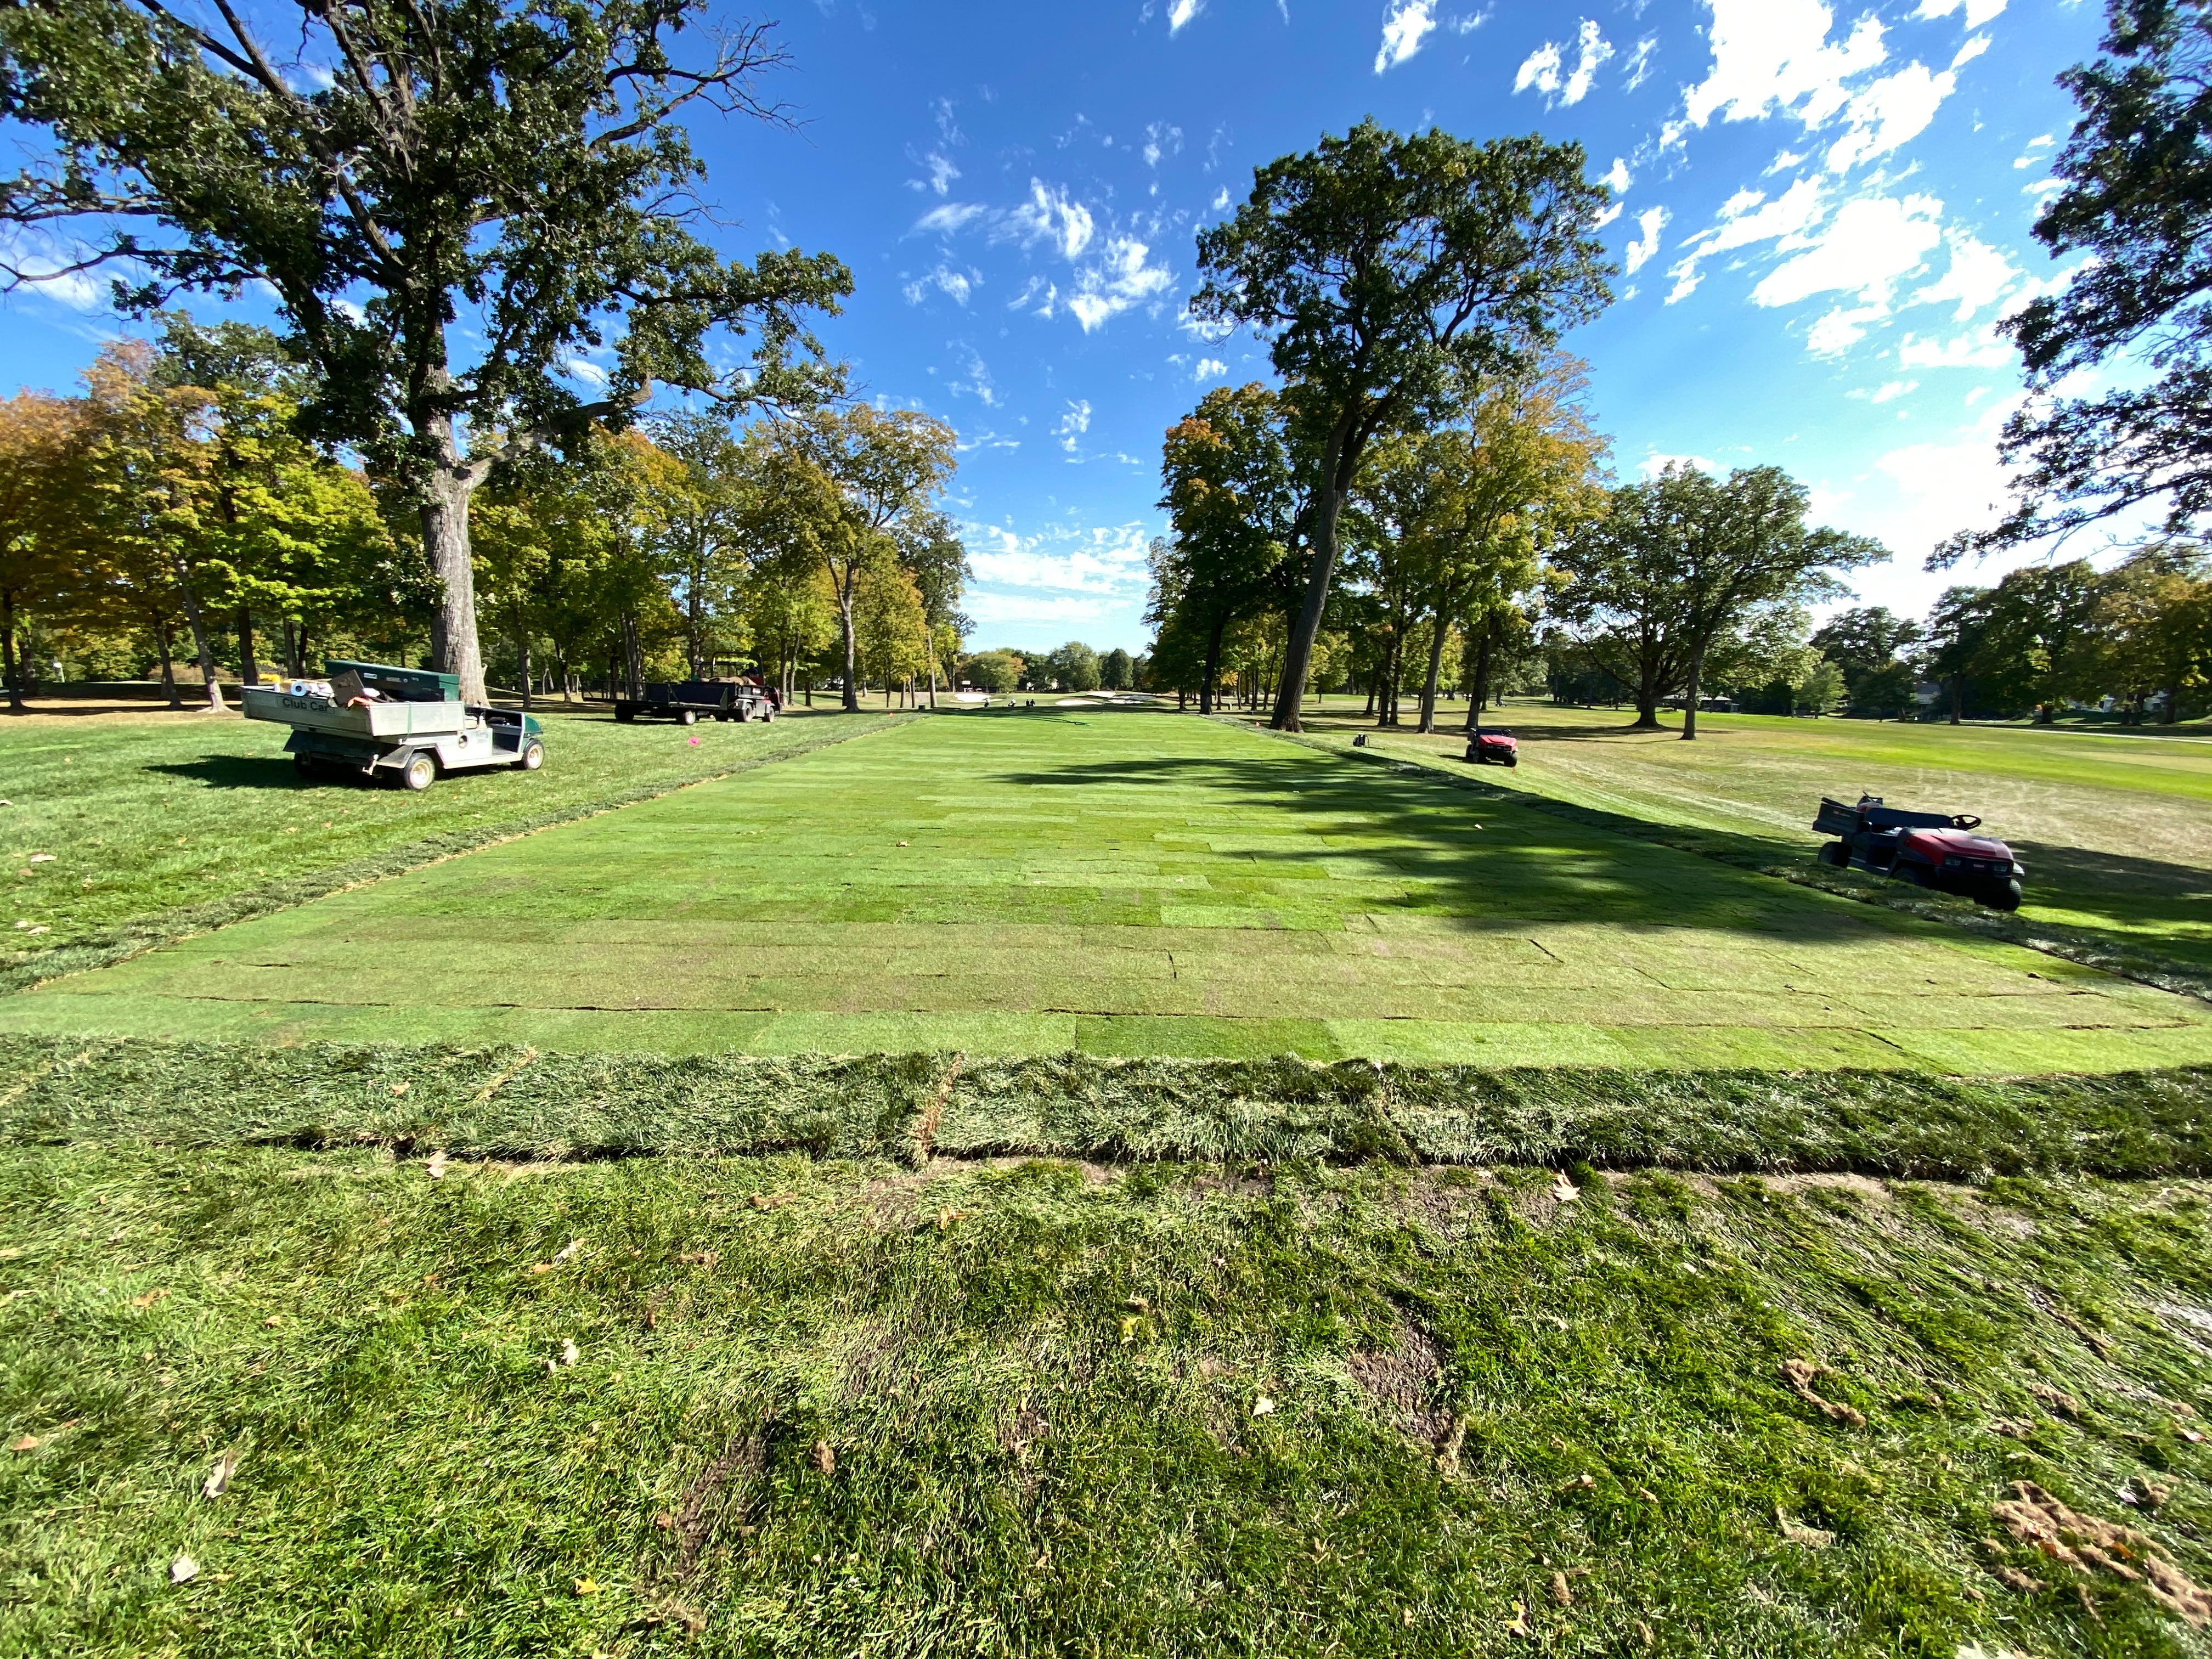
When it’s time to sod, we start with a strip all the way down each side of the tee, then lay the sod perpendicular to play. We have found that when the sod is laid parallel to play, the sod seems can be visible for some time.

Once sodding is complete, the tee is back in play in about two weeks or so.

As I mentioned earlier, I once thought leveling teeing grounds to be out of reach as an in-house project. Once doing some research on the laser-guided blade and the other tools necessary, the ROI turned out to be quite high.
I’ve never been one to take on complicated in-house project. Maybe you, like I once did, thought this work was too complicated and out of reach; it isn’t. When the work is done, it is one of those “next-level” improvements for which we all strive. If you want to know more about our equipment and process, get in touch in the comment section below.
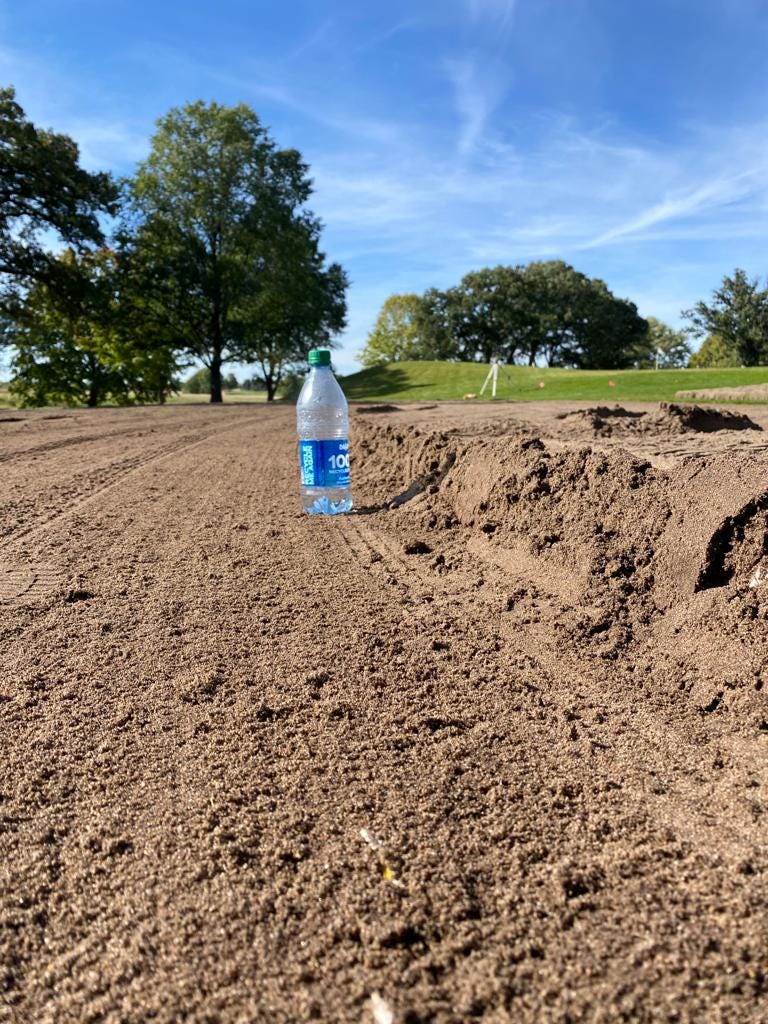
Our experience has shown that 20 year old par 3 tee, getting regular use, will have about a 4-inch crown.
By the time we finished our first practice tee, I figured we had already paid for the machine.
It is easiest to mark the divoted areas before cutting the sod. They can then be discarded before the sod is rolled up. This is an iteration the team came up with through the process.
Reverse spinning tines are necessary to break up the root-mass of the tee. A forward spinning tiller will simply walk over the top of the surface.
We are looking at multiple tee projects over the next 2-3 years. Would also like to know the brand names of your equipment and any price information you may have. Located in Southwest Ohio.
Email: turner.jt.6@gmail.com
Chris, would you please share the brand names of your tiller and laser equipment. We are facing a similar situation, playing 250-300 players a day in season and still quite busy in our summer months.
I am in Scottsdale, Arizona.
My e-mail is jbroughton@orangetreegolfcourse.com